
Last updated on June 8th, 2023 at 06:20 am
If you own a bass boat, you know that taking care of its interior is essential to maintain its beauty and functionality. One important aspect of boat maintenance is installing proper carpet padding. In this comprehensive guide, we will walk you through the process of how to install boat carpet padding in bass boats.
Whether you’re a seasoned angler or a newcomer to the boating world, this step-by-step guide will help you achieve a professional-looking installation.
Should You Staple or Glue Boat Carpet?
When it comes to installing boat carpets, one common question that arises is whether to staple or glue them down.
Both methods have their pros and cons, and the choice ultimately depends on personal preference and the specific needs of your boat.
Stapling
Stapling the boat carpet provides a secure and tight fit. This method involves using stainless steel staples to fasten the carpet to the boat’s deck or subfloor.
Stapling is a popular choice as it allows for easy removal and replacement if necessary. However, it’s important to note that over time, staples may cause wear and tear on the carpet.
Gluing
Gluing the boat carpet down offers a more permanent solution. It involves using a marine-grade adhesive to secure the carpet to the boat’s surface.
Gluing provides a seamless look without the risk of staples causing damage. However, keep in mind that removing glued carpet can be challenging, and it may require more effort and time compared to stapling.
How to Install Boat Carpet Padding
Before installing the boat carpet padding, it’s essential to prepare the boat’s surface properly.
Remove Old Carpet and Padding
The Importance of Removing Old Carpet and Padding
The first step in installing new boat carpet padding is to remove the old carpet and padding. This is an essential part of the process, as it ensures that the new padding will be properly installed and will not have any bumps or lumps.
Additionally, removing the old carpet and padding gives you a fresh canvas to work with, which is important for achieving a professional look.
How to Remove Old Carpet and Padding
Removing old carpet and padding can be a challenging task, but there are several steps you can take to make it easier.
First, start by cutting the old carpet into manageable sections using a utility knife or scissors.
Then, use a scraper or putty knife to remove as much of the old adhesive as possible. If there is still adhesive remaining after scraping, you can use chemical adhesive removers or solvents to break down the remaining glue.
Tips for Removing Stubborn Adhesive Residue
If you encounter stubborn adhesive residue that won’t come off with scraping or solvent treatments, there are additional steps you can take. One tip is to try heating up the adhesive with a heat gun or hair dryer before scraping it off.
Another tip is to use sandpaper or an abrasive pad attached to an orbital sander to remove any remaining bits of adhesive that won’t budge with other methods.
By taking your time and being patient during this process, you’ll be able to fully remove all of your old carpeting material without damaging your boat’s floor or leaving behind any unwanted residue that may complicate your installation process later on.
Here’s a step-by-step guide to help you with the installation process:
Gather the Tools and Materials:
- Boat carpet padding
- Marine-grade adhesive (if gluing)
- Stainless steel staples (if stapling)
- Utility knife
- Staple gun (if stapling)
- Measuring tape
- Paint roller (if gluing)
Measure and Cut Padding
Measuring for Accuracy
The first step in installing carpet padding in your bass boat is to properly measure the area where the new padding will be installed.
It is important to take accurate measurements so that you can purchase enough padding and cut it to the right size.
Use a tape measure or ruler to measure from edge to edge of each section that needs padding, making sure to account for any curves or corners. When measuring, it’s always best to add a little extra length just in case.
This will ensure that you have enough material to work with, even if you make a mistake during the cutting process. Remember, it’s easier to trim off excess material than it is to add more if you come up short.
Cutting with Precision
Once you have taken accurate measurements of the areas where the new padding will be installed, it’s time to cut your carpet padding pieces. Before starting, make sure you have all of the necessary tools on hand including scissors or a utility knife and a cutting mat.
To create clean cuts, use a sharp pair of scissors or a utility knife with a fresh blade.
Place your carpet padding on the cutting mat and carefully follow your markings with your cutting tool. Make sure that each piece fits perfectly within its designated area before moving on.
If there are any unusual curves or angles that need attention, don’t hesitate to use small snips or cuts as necessary for proper fitting.
A little extra time spent ensuring accuracy during this step will pay off in spades later when everything fits together seamlessly!
Apply Adhesive
Sticking it all together
Now that you have the padding cut to fit and ready to go, it’s time to start applying adhesive. Before you begin, make sure to wear gloves and a mask to avoid inhaling any fumes from the adhesive. Start by applying the adhesive onto each section where you will lay down the padding.
You can use a brush, roller, or trowel – whatever works best for you. When applying the adhesive, make sure that each section is fully covered with an even layer of glue.
Try not to apply too little or too much glue, as this could lead to problems during installation. If there’s not enough glue applied on a section, it may not hold properly once laid down.
On the other hand, if there’s too much glue applied in one area, it could cause bubbles and wrinkles in the padding.
A good rule of thumb is to apply enough glue so that when you press down on a section with your hand or tool, there is slight resistance.
How much adhesive do I need?
The amount of adhesive needed will vary depending on the size of your boat and how many sections you are working with. A good estimate for most boats is about 1 gallon of adhesive per 8 feet of carpeting – but again, this will depend on your specific boat measurements.
It’s always better to have more than enough adhesive than not enough at all. So be sure to purchase enough for your project plus a little extra just in case something goes wrong during installation or if some areas require more glue than others.
Applying adhesive may seem like a tedious task but it’s important for ensuring that your new carpet padding stays securely in place over time. By following these tips and using the right amount of glue for each section, you’ll be well on your way to a successful installation.
Install Padding
Careful Laying
Now that you have measured, cut, and applied adhesive to each section of the boat’s floor, it’s time to carefully lay down the new padding onto the adhesive-covered areas. Begin by starting at one end of the section and slowly unrolling the padding onto the adhesive.
Make sure that you align it properly so that it fits perfectly into place. If necessary, gently lift and adjust as needed to ensure a perfect fit.
As you lay down each section of padding, avoid pressing too hard or pushing aggressively on any areas as this can cause air pockets or wrinkles in the padding. This is especially important if you have larger sections of padding to install.
Preventing Air Bubbles and Wrinkles
To prevent air bubbles from forming underneath your new carpeting, take your time when applying each section.
If you do encounter an air bubble or wrinkle during installation, don’t panic! Simply lift up that area gently with your fingers and smooth out any bumps or creases until it lays flat.
Another trick for preventing wrinkles is to use a rolling pin on top of each section once they are in place. Lightly roll over any bubbles until they disappear completely underfoot – this way no one will ever know they were there!
Take care not to press too hard though – we don’t want any unwanted dents in our beautiful new carpeting!
Overall, patience is key when installing boat carpet padding- especially if this is your first time doing so.
Don’t rush through steps and give yourself plenty of time to complete each phase correctly. By following these tips for careful laying and preventing wrinkles or bubbles, your bass boat will look like new in no time at all!
Trim Excess Padding
Now that your new padding is installed, it’s time to trim any excess material. Trimming the padding may seem like a daunting task, but with a sharp utility knife or pair of scissors, it can be done quickly and easily.
The goal is to create clean, straight edges that match the contour of your boat’s floor.
Start by examining the edges of each section where you installed padding. Look for any areas where there is excess material or uneven edges.
Use a pencil or marker to mark where you want to trim the excess padding. Be sure to leave a little extra if you’re uncertain; you can always trim more off later.
How to install boat carpet padding Youtube Video Tutorial
—
Do You Have to Glue Down Carpet Padding?
While gluing down boat carpet padding provides a more permanent solution, it’s not always necessary.
The decision to glue or staple the carpet padding depends on various factors, such as the type of boat, personal preference, and the intended use of the boat.
If you have a bass boat and frequently participate in high-speed activities or rough water conditions, gluing the carpet padding may be a wise choice. It ensures that the padding remains securely in place even under intense vibrations and movement.
However, if you prefer the flexibility of easily removing and replacing the carpet padding or if you have a boat used primarily for leisurely fishing trips, stapling can be a suitable option.
Remember, regardless of the method you choose, proper installation and maintenance are crucial to ensure the longevity and effectiveness of the boat carpet padding.
Which Side Goes Down on Carpet Padding?
When installing boat carpet padding, it’s important to identify which side should face down. Most boat carpet padding comes with one side featuring a textured or dimpled surface, while the other side is smooth.
The textured side of the carpet padding should face down, against the boat’s surface. The dimples or texture provide added grip, helping to prevent the padding from shifting or sliding.
How to Install Boat Carpet Padding: User Advice
It’s always a good way to ask for advice.
We have made our research on boat owner forums and talking boards and gathered some main points and advice on bass boat carpet padding:
| Point | Information |
|---|---|
| Glue for padding and carpet | Use the same glue (weldwood original) for both |
| Installing padding | Leave about two inches around the sides of the padding |
| Seat pedestal hole | Cut a hole with a razor knife before installing the carpet |
| Thinning glue | Weldwood original adhesive does not need thinning |
| Edges of the mat | 45-degree angle may be recommended for the edges of the mat |
| Leaving space around lids | Cut the padding flush where the deck meets the lids |
| Amount of space from the sides | Leave at least 1.5 inches for the carpet to stay in place |
| Installing around lids | Cut the padding flush on the lids and deck surrounding them |
| Adhesive for carpet | Birdsong adhesives are recommended for closed cell foam |
| Where to get carpet and foam | Bass Cat and Classic Fiberglass are suggested sources |
| Samples of marine carpet | Request samples from places that sell marine carpet |
| Padding supplier | Pro-Tech Mats offers quality foam for padding |
| Adhesive for closed cell foam | Use a special adhesive that doesn’t need air exposure to dry |
| Lacquer thinner vs. xylene for glue removal | Xylene is more effective than lacquer thinner for removing glue |
| Point | Information |
|---|---|
| Padding Size | Cut the padding 3/4 inches shorter than the carpet. |
| Glueing Process | Glue the padding down first, then glue the carpet to the padding. |
| Position of Shiny Side | The shiny side of the padding should face up as a moisture barrier. |
| Drying Time | The carpet and padding do not take longer than normal to dry. |
| Water Absorption | The padding does not absorb water. |
| Deck Lid Tips | No specific tips were mentioned about the deck lids. |
Boat Carpet Replacement Options
If you’re considering replacing your boat’s carpet, it’s essential to explore various options available in the market.
Here are a few popular boat carpet replacement options to consider:
- Marine-Grade Carpet: Marine-grade carpet is specifically designed for boat applications. It is resistant to water, mold, mildew, and UV damage, making it an ideal choice for boats exposed to the elements.
- Vinyl Flooring: Vinyl flooring has gained popularity as a durable and low-maintenance alternative to traditional carpets. It is easy to clean, offers excellent traction, and is available in various colors and patterns.
- Synthetic Grass: Synthetic grass provides a unique and eye-catching look to your boat’s interior. It offers a comfortable and soft surface, while also being resistant to water and UV damage.
- Hydro-Turf: Hydro-Turf is a specialized type of boat carpet that offers superior traction and cushioning. It is often used in high-performance boats or for watersports activities.
- Snap-In Carpet: Snap-in carpet is a versatile option that allows for easy removal and replacement. It features a series of snaps or fasteners that secure the carpet in place, providing a neat and custom fit.
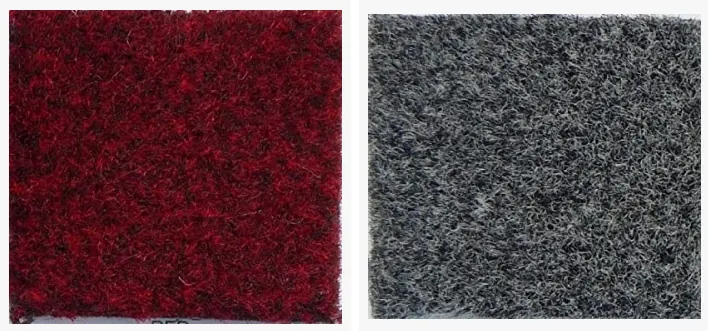
Marine-Grade Carpet
Conclusion
Installing boat carpet padding in your bass boat is a crucial step to ensure comfort, protection, and aesthetics.
Whether you choose to staple or glue the carpet padding, following the step-by-step guide outlined in this article will help you achieve a successful installation.
Remember to consider the specific needs of your boat and explore various boat carpet replacement options to find the one that suits your preferences and requirements. Happy boating!


